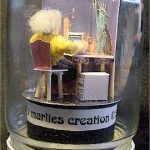
I made this figure to fit into my computer nerd glass jar room box.
After some experimentation with size I figured a way to make some 2-inch tall sitting figures (1/24 scale).
Body
- cut a 5-inch piece off a chenille stem.
- with needlenose plyers make small loop at each end of the piece.
- fold in half so that it is now about 2-inches tall (figure 1).
- now to make the figure sit down measure from the feet up ¾-inch and make a bend for the knee next measure ½-inch up (the thighs) and make a bend in the opposite direction you’re now left with an upper body that’s about 1-inch tall (figure 2)
Arms
- cut a 3½-inch piece off a chenille stem
- with plyers make a small loop at each end.
- make a small bend in the center of the piece
- place the piece behind the body piece and wrap each arm around the corresponding body side from the outside to the inside and behind. This makes the arms stay put. next make a bend at the elbow about ½-inch from the hand (figure 3 above).
Head and Hair
- for the head I used a small wooden bead for the hair is used some lambs wool I had lying around.
- I threaded it through the bead before I pushed the bead onto the body. That kept it in place. Now the hair sticks straight up and I didn’t want that, so I glued it down.
Clothes
- My next problem was dressing the figure. Then I remembered that I had seen a pattern on the web for pants. I saved the pattern to my harddrive and opened the file in my graphics program. Click on the images below to save them. Devant = front, Dos = back
- place the pattern on the fabric, mark it and then cut it out and sew it together.
- The shirt is very simple to make I folded a piece of fabric in half so that the fold was the shoulders and cut a small circle for the neck and some arms.
For a 1/12 scale figure double all the measurements.


